Windows Guide: Callback Drive for Microsoft Azure
Requirements: Callback Drive for Microsoft Azure
Introduction
Callback Drive for Microsoft Azure is an easy-to-use utility that mounts an Azure Storage File Share as a Windows drive. Once connected, you can browse and work with files as if they were stored on your local machine. The application is simple-to-use, yet very flexible and designed with performance and security in mind.
Contents
Configuring a New Drive
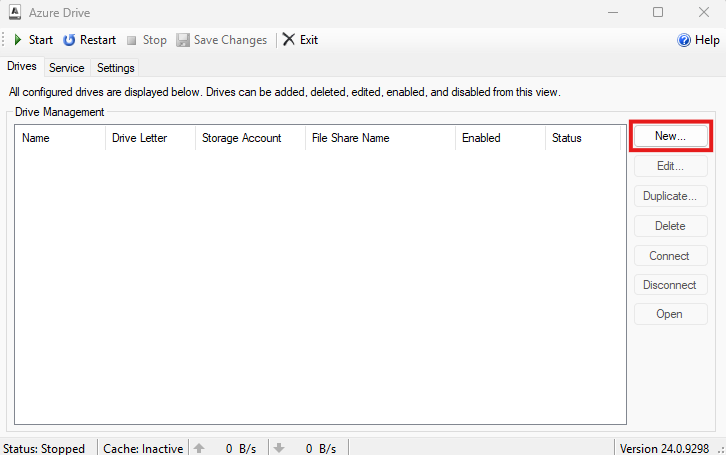
Connecting a drive to an Azure Storage File Share is the primary function of the product and is designed to be simple. The following basic steps are all that's needed to mount a drive.
From the Drives tab of the main window, click New... to open the Edit Drive dialog.
On the Edit Drive dialog input a local drive name and choose a drive letter. If the Azure tenant uses different governmental endpoints, select the corresponding endpoints, otherwise leave it a Global. Then, provide the name of the Storage Account the drive should be accessing. Next, select between Access Key or OAuth for authentication. Finally, provide the File Share Name and if Callback Drive for Microsoft Azure should open within a specific Subfolder.
Contact your Azure Storage administrator to help make the decision between OAuth and Access Key authentication. If OAuth is selected, Azure will prompt the user to provide permission for Callback Drive for Microsoft Azure to "Access Azure Storage As the Signed-in User". Additionally, if using OAuth, the Authenticate button can be used to complete the authentication process. If a different account needs to be selected in the future, it can also be used to force the authentication process again.
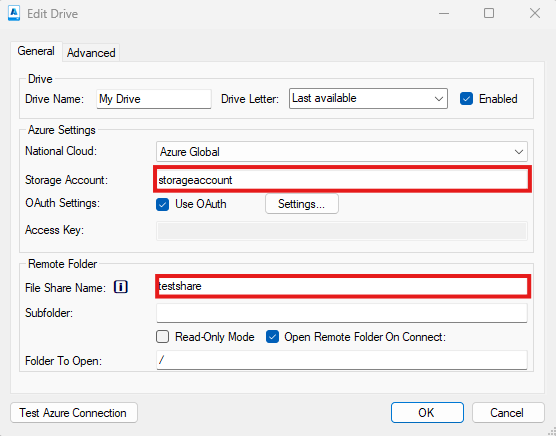
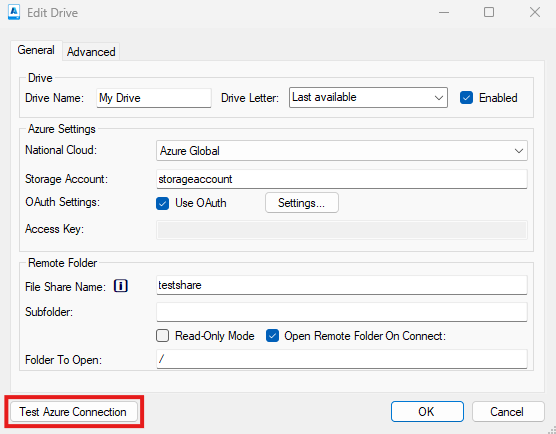
Click Test Azure Connection to verify the connection to the Azure Storage server, then press OK to save the new drive configuration.
Press Start on the main window to connect all the enabled drives.
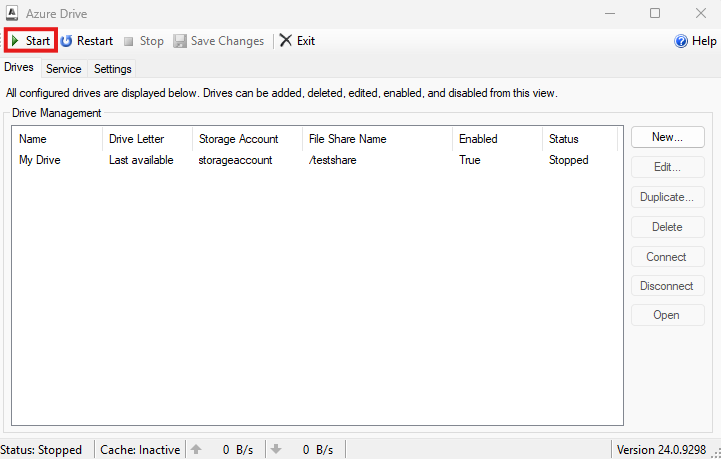
The drive should now be visible in Explorer and available to access by any application on the machine.

Finding your Azure File Share Information
Callback Drive for Microsoft Azure requires that the Account Name and File Share Name be provided when creating a new drive. This information can be found from the Azure Portal or by parsing the Share URL provided by Azure.
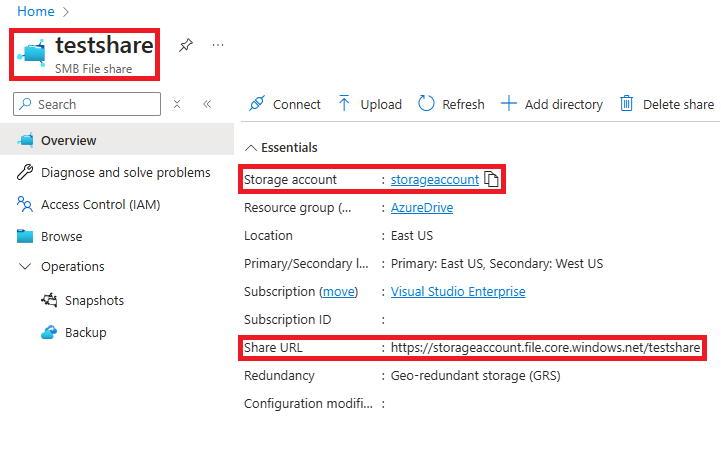
In the above picture, the file share name (testshare) is highlighted in the top left corner and the storage account is highlighted under the Essentials. Additionally, the share URL is highlighted under the essentials. If provided just the share URL, the account information is in the first section of the domain and the file share name is in the first part of the path. For example, the important information is in bold in the
https://storageaccount.file.core.windows.net/testshare
We appreciate your feedback. If you have any questions, comments, or suggestions about this article please contact our support team at support@callback.com.